Author: Sam Lindsay

ServiceNow Upgrade Process


With ServiceNow committing to two major releases a year and only allowing customers to operate on n-1, having a well understood upgrade process is not a luxury, it’s a necessity.

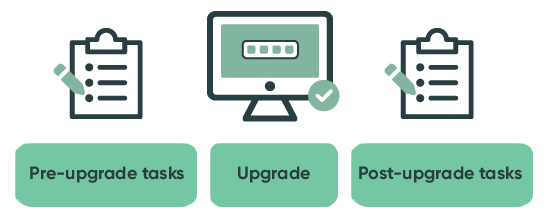
To reduce the risk of disruption to the business during upgrades, JDS recommends organisations adopt a clearly defined strategy for upgrades.

  1. Prepare Environments
    • Back up any update sets in non-production
    • Clone production over non-production so the latest configuration and data is available for accurate testing. The clone should include the audit history and the system logs.
    • Upgrade non-production to the latest version of ServiceNow
    • If necessary, reapply update sets, although the recommendation is to suspend custom development during the upgrade process
  2. Bottom-Up Analysis—Review of the upgrade logs:
    • Review skipped updates to understand any potential impact on the upgrade. Although the focus is on skipped records from the latest upgrade, it is important to understand previous skipped records as there may be dependencies that cause complications
    • Focus upgrade testing on areas where updates have been skipped to ensure there are no adverse effects
    • Provide recommendations on where skipped records should be restored or merged to future-proof the organisation
  3. Top-Down Testing—Upgrade testing
    • End-to-end business process testing to ensure the veracity of the upgrade in non-production
      • Business involvement from SMEs (subject-matter experts) is critical to the success of upgrade testing
      • Where possible, follow previously established test cases
      • In the absence of established test cases, JDS recommends a random sample of records, following the audit history of each record and duplicating each step with a new test record (including impersonating users and replicating each of their updates)
      • Automated testing is intended to supplement manual testing
    • Integration testing
      • As much as possible, verify integration works as expected in non-production
      • Inbound email actions can be replicated by manually importing the relevant email XML record from production into non-prod and manually activating the “reprocess email” command
      • Outbound emails can be viewed in the email queue
  1. Defect identification and resolution
    • Based on the results of the previous steps, defects will be classified as
      1. Relating to the core system and therefore the responsibility of ServiceNow support
      2. Relating to the customised system and therefore the responsibility of the customer
        • Where possible, JDS will propose and implement defect resolution in consultation with the customer
        • If issues cannot be resolved, JDS will propose and implement a workaround
      3. User Acceptance Testing
        • UAT should not be confused with the upgrade testing. The bulk of end user testing should have already occurred under the upgrade testing phase. This particular UAT is intended to verify defect resolution.
        • UAT validates the issues exposed during the upgrade process have been rectified to the satisfaction of customer.
        • It is important to note that UAT need not be exhaustive as it's role is to confirm that defects exposed during upgrade testing were resolved
          • Additional defect resolution may be required if additional issues are exposed.
  1. Go Live
    • Upgrade production environment
    • Apply update sets based on the defect identification and resolution
    • Clone back to non-production environments to ensure all environments are in sync and on the latest version of ServiceNow
  2. Go Live Support
    • JDS recommends a go-live support for a period of two weeks
      • Any issues raised during the go-live warranty period will be subject to development and testing in non-prod and will require change management approval before deployment in production
      • If no issues arise, there’s time for enacting best practices and enhancements

The focus of upgrade testing is risk mitigation. The amount of time and effort spent on each of these phases will differ from one customer to the next depending on the size and complexity of their ServiceNow instance, along with the criticality of ServiceNow to their business practices.

If you want to learn more about upgrading ServiceNow, talk to JDS.

Modifying Service Portal Widgets On-The-Fly


Recently, a customer asked us to remove their Get Help catalog item from the list of Popular Items in the Service Portal because it's not really an item (it's a record producer) and it's accessed from the home page as well as being in the menu bar so it doesn't really belong under Popular Items.

The challenge was, how could this be done WITHOUT changing/modifying the widget (to avoid skipped upgrade updates)

Previously, I've written about how to manipulate portal widgets without modifying them, but that was on submission. This required modifying the widget on load, dynamically changing its contents on-the-fly without actually altering the core widget itself. The trick is to embed the OOB widget and use angular to inject the change.

As you'll see, the code is simple and yet effective, and could be repurposed for a number of other similar applications. Our custom widget acts as a wrapper around the OOB widget (which in this case is sc-category)

Widget HTML Code

<div>
   <sp-widget widget="data.remoteControlWidget"></sp-widget>
</div>

Widget Server Code

(function() {
        data.remoteControlWidget = $sp.getWidget("sc-category");
})();

Widget Client Controller Code

function($scope) {        

        var c = this;
        //We can get the angular data object of BOTH widgets
        var thisWidgetsData     = $scope.data;
        var theOtherWidgetsData = $scope.widget.data.remoteControlWidget.data;

        //Look at the remote scope.data object for sc category to see if have the item we want to hide/remove?
        theOtherWidgetsData.items.forEach(function(item, location){

               //Is our "Get Help" widget on the page?
               if(item.sys_id=='ea8accaedb0508103ea3cd051496198b'){

                       //Angular's injector invoke will allow us to change the scope within a digest
                       window.angular.element(document.body).injector().invoke(function($compile) {

                               //Now we can modify the other widgets scope and angular will do the rest
                               theOtherWidgetsData.items.splice(location,1);
                       });
               }
        })      
}

In essence, all we're doing is remotely accessing the OOB widget's angular scope and then using angular's injector to update that scope.

Although this might seem overly complex, we can look at the scope of any angular widget by holding down the Control key and right-clicking above the widget. Once we've identified what needs to change (in this case, removing an entry from an array), the rest is quite simple.

Have fun!

Custom Glide Modal Dialog Boxes in ServiceNow


Modal popups are an effective way of interacting with users when more information is required than would ordinarily be available on a screen. For example, confirming a deletion or getting more information when someone is submitting a record.

ServiceNow has a client-side API called GlideModal but the documentation is focused around displaying records or lists from ServiceNow rather than ad-hoc modal details. There are times when customers need a custom form with a few specific options.

In this example, we're going to add a UI Action button to the catalog task form so when a task is cancelled we can mark it as either:

  • Closed skipped - effectively cancelling the task
  • Closed incomplete - closing all related tasks along with the requested item itself

In this way, we're giving our users the ability to clearly determine what they're cancelling—just one particular task or the whole request.

UI Actions run code on both the client and the server, which is very handy.

The key to getting flexibility with glide modal dialogs is the renderWithContent function which allows us to craft our own HTML form and the window.whatever which allows us to intercept and interpret whatever happened on our modal window as the user interacted with the various options we gave them.

Consider the following code:

////////////////////////////////////////////////////////////////
//Client Side: Dialog box with choices
////////////////////////////////////////////////////////////////
function cancelDialog(){

   var gm = new GlideModal('cancelTask');
   //Sets the dialog title
   gm.setTitle('Cancel Task');
   //Set up valid custom HTML to be displayed
   gm.renderWithContent('<div style="padding:15px"><p>What action do you want to take?</p><p><select name="cancellation" id="taskCancellation" class="form-control"><option value="cancelOnly" role="option">Cancel this task but keep the requested item open</option><option value="cancelAll" role="option">Cancel this and all other tasks, closing the requested item</option></select></p><div style="padding:5px;float:right"><button style="padding:5px;margin-right:10px" onclick="window.changeTaskAction(this.innerHTML,jQuery(\'#taskCancellation\').val())" class="btn btn-default">Abort</button><button style="padding:5px" class="btn btn-primary" onclick="window.changeTaskAction(this.innerHTML,jQuery(\'#taskCancellation\').val())">Cancel Task</button></div></div>');

   //We'll use the windows object to ensure our code is accessible from the modal dialog
   window.changeTaskAction = function(thisButton, thisAction){

      //Close the glide modal dialog window
      gm.destroy();

      //Submit to the back-end
      if(thisButton=='Cancel Task'){
         if(thisAction=="cancelAll"){
            g_form.setValue('state',4);//Closed Incomplete -- will close the Requested Item and all other open tasks
         }else{
            g_form.setValue('state',7);//Closed Skipped -- will only close this task
         }
         //Regular ServiceNow form submission
         gsftSubmit(null, g_form.getFormElement(), 'cancel_sc_task');
      }
   };
   return false;//prevents the form from submitting when the dialog first load
}

////////////////////////////////////////////////////////////////
//Server Side: Dialog box with choices
////////////////////////////////////////////////////////////////
if (typeof window == 'undefined')
   updateTask();

function updateTask(){
   //Runs on the server
      if(current.state==7){
      //closed skipped so simply update this one record
      current.update();
   }else{
      //closed incomplete so update all associated records to close the requested item entirely
      current.update();

      //And now we'll cancel any other open tasks along with the requested item
      if(!gs.nil(current.parent)){
         //Close siblings
         var otherTasks = new GlideRecord('sc_task');
         otherTasks.addEncodedQuery('request_item='+current.request_item+'^stateIN-5,1,2');
         otherTasks.query();
         while(otherTasks.next()){
            otherTasks.state = '4';
            otherTasks.update();
         }
         //Close parent
         var ritm = new GlideRecord('sc_req_item');
         if(ritm.get(current.parent)){
            ritm.state = '4';
            ritm.stage = 'Cancelled';
            ritm.update();
         }
      }
   }
}

Our Glide Modal Dialog presents the user with two options in the browser and then executes the user’s preference on the server.

Code like this can be easily retrofitted, becoming a template for how ServiceNow interacts with users before records are saved. This code has been provided in an attachment. If for some reason the attached UI Action doesn't work for you, toggle the "isolate script" field (save it on then save it switched off) and it should run just fine.

Click here for a copy of the code: sys_ui_action Cancel Catalog Task

Happy coding.

Manipulating Service Portal Widgets Without Modifying Them


It’s common for organisations to want something a little bit more than what is on offer by ServiceNow in its service portal, but without breaking any core functionality. In this article, we’ll look at how you can manipulate an existing out-of-the-box widget WITHOUT modifying it.

One option is to clone the widget and change it but that causes your cloned version to become locked in time, so it won’t benefit from any enhancements or bug-fixes applied to the original widget by ServiceNow as versions upgrade.

A better approach is to embed the original widget INSIDE another widget and make your modifications there. In this way, you get the best of both worlds. Any changes to the widget will be automatically inherited, while you can change the behaviour of that widget at ease.

This article assumes you are confident in developing custom widgets. If you need more information on what service portal widgets are and how they work, please refer to:

Here’s how it can be done (with this code sample provided at the bottom of the article)

First, notice we’re using the sp-widget directive to embed an OOB widget, but we’re going to use an angular data object (essentially a variable) to hold the name of that widget. This gives us the flexibility to add HTML/Angular before and after the widget.

We populate this angular object in the server script. This gives us the ability to set any properties the widget might be expecting. In this case, we’re going to use the ServiceNow catalogue item widget (v2)

Now, in our client script, we can refer to data in BOTH our widget and the OOB widget, something that is extremely handy!

Finally, in this example, we’re interested to add some extra functionality when the original OOB widget is submitted. Looking at the client script for the OOB widget, we can see that ServiceNow are using broadcast events to transmit (emit) various actions. This is what we’ll intercept.

As you can see there are several events we could intercept and augment, like when a submission fails. Once we know what we’re looking for we can simply listen in the background, waiting for that event to occur.

Once that event fires, we can then choose to do something in addition to what the OOB widget is doing using both client and server code in our custom widget (and importantly, acting on information gathered by the OOB widget itself).

$scope.server.get allows us to send an action the server where it is processed and the response is returned.

In this way, we can manipulate an out-of-the-box widget provided by ServiceNow without modifying or cloning it.

Please find example XML here: sp_widget example